
Text settings Story text Size Small Standard Large Width * Standard Wide Links Standard Orange * Subscribers only Learn more Minimize to nav One of the most useful gadgets in my kitchen is now a screen that never asks me for anything. I recently bought a $48 DIY display kit from Seeed Studio (yes, that’s three E’s), developed in collaboration with TRMNL, that lets me display whatever I want, using whichever software ecosystem I prefer. I previously built something similar by modding a Lenovo ThinkSmart View, which was selling for around $30 on eBay during a liquidation. The Lenovo device was only ever intended for business-to-business video, but it does a decent job of running a fork of LineageOS.
Unfortunately, its limited RAM makes it sluggish. So when I came across the TRMNL kit and its e-paper display, I was sold. I’d have an always-on display that shows me the information I want, with no subscription required. And since the screen populates automatically, I would never have to wrestle with a slow interface.
I think they can live in harmony. Credit: Nick Indge I think they can live in harmony. Credit: Nick Indge The Seeed Studio kit and TRMNL ecosystem aren’t trying to compete with products like the recently announced Apple HomeView, a $299 home hub designed to get the whole family interacting with it. If anything, the TRMNL kit is the HomeView’s antithesis.
It’s designed to be entirely passive: The e-paper display stays on, cycling through potentially useful information on your desk or in your kitchen, from calendars and weather to news and all sorts of ideas thought up by its community members. Here’s how it works. Choosing a path TRMNL, the platform company, was founded by indie hardware enthusiast Ryan Kulp in 2023. Its first e-paper device launched via crowdfunding in 2024.
Seeed Studio provides the hardware. The established Shenzhen open hardware company is best known for its XIAO microcontroller boards. In March 2025, Seeed teased an XIAO e-paper panel on social media, prompting a community member to ask whether it could run TRMNL firmware. The question brought the two teams together, and in July 2025, they announced an official partnership to develop a DIY e-paper kit combining Seeed’s hardware designs with TRMNL’s firmware packages.
Seeed Studios monochrome display. Credit: Nick Indge Seeed Studios monochrome display. Credit: Nick Indge Seeed designs and manufactures the hardware, while TRMNL maintains the firmware, plugins, and hosted service. But you’ll still need to make some decisions about how to set up the kit.
There are three ways to get it running, depending on your budget and how comfortable you are with managing software yourself. The stock TRMNL setup connects you with the company’s “BYOD ecosystem” (bring your own device), letting you use trmnl.com as your information server with a 14-day free trial. After that, you’ll need to pay a one-time $50 license fee to keep your device connected to TRMNL servers. If you’d rather go your own way, Seeed offers software options, including Home Assistant compatibility, that don’t require a TRMNL connection or license.
You can also access the SenseCraft Seeedash platform, which includes a plugin repository and design workspace. It’s worth checking out the options before committing to a $50 TRMNL license. The browser-based platform also includes a firmware-flashing tool Seeed describes as simple enough for anyone to use. If you already have a server up and running, you can point the device right at it.
Terminus is TRMNL’s open source container for this setup. The Terminus GitHub page describes the BYOS as providing “privacy first functionality by empowering you to run your own private server, network, and devices. You own the stack and the data.” The e-paper display and control board simply ping an API to retrieve the information to display. You can even write plugins in HTML, which the screen renders as a bitmap.
The trade-off is that your server needs to stay online, and maintaining it may bring some system-admin headaches some users may want to avoid. But hey, that’s why there are options. An example of a weather app on the Seeed firmware. An example of a weather app on the Seeed firmware.
The display refreshing feeds while loading. The display refreshing feeds while loading. You can edit the list from your phone. You can edit the list from your phone.
The display refreshing feeds while loading. You can edit the list from your phone. What’s in the box? XIAO ePaper Display Dev Board with XIAO ESP32-S3 Plus onboard 7.5-inch monochrome ePaper display (800 × 480 pixels) FPC extension cable (10 cm) FPC connector 2,000 mAh rechargeable Li-ion battery Wi-Fi antenna Two official case designs are available for 3D printing: a triangular prism and an L-shaped case.
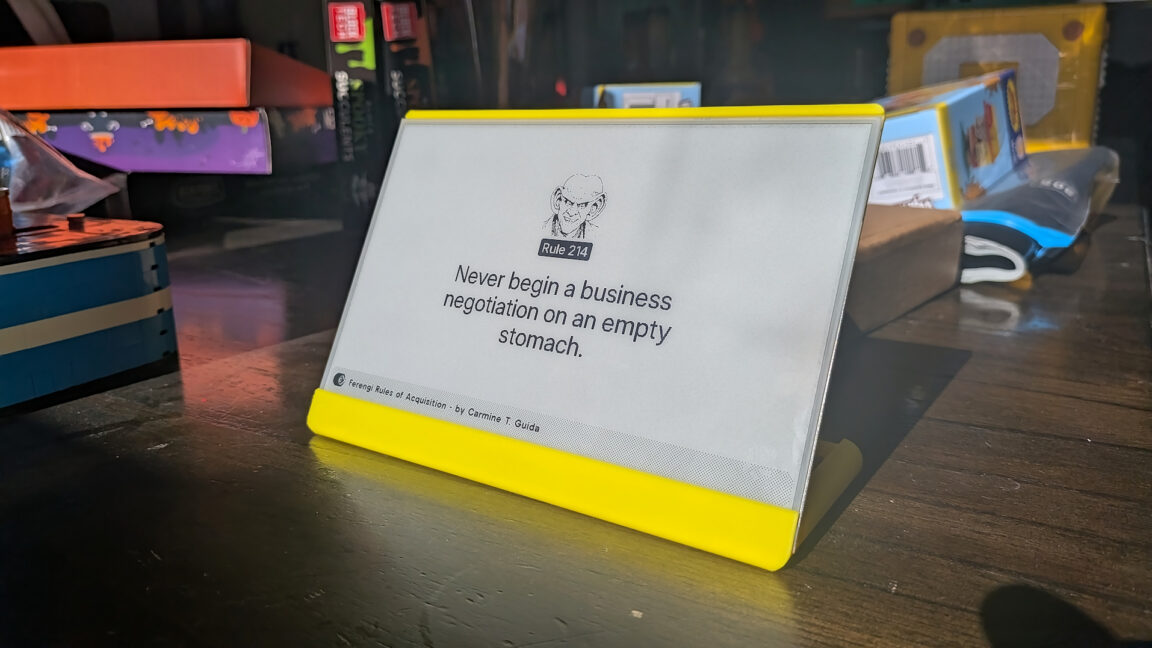
I went for the latter, and although I’d hoped assembly would be as simple as plugging everything in and slotting the pieces into place, it proved to be a bit more involved. The kit came with all the hardware I needed, with one slight hiccup: I’d forgotten to order a case or display stand. Fortunately, TRMNL is a proper DIY project, and there are print files available for recommended stand setups. A quick print at my local library’s Bambu printer and $8 solved the problem.
I probably should have chosen something other than “dealer’s choice” for the PLA color, as I ended up with a bright canary yellow device case. At least it stands out on my kitchen countertop. The hardware is included, not the stand. Credit: Nick Indge The hardware is included, not the stand.
Credit: Nick Indge I’d recommend trying the prism shell design over the L-style case I chose because the latter required me to cut a channel for the ribbon cable extension. It wasn’t a huge deal for a project like this, but you may need to do some extra work and fiddle with the fit. You’ll also need needle-nose pliers to remove the print’s support trees from the narrow space. Be prepared to clear out tiny rows of support trees.
Credit: Nick Indge Be prepared to clear out tiny rows of support trees. Credit: Nick Indge Assembly Before trying to fit everything into the printed case, I wanted to make sure the hardware worked, so I connected the parts on my workbench. The case-less assembly couldn’t be simpler: Connect the battery or a USB-C power source, plug the display directly into the board, and you’re good to go. From there, connect your phone or tablet to the device’s Wi-Fi and enter your local Wi-Fi credentials.
It lives! It lives! If you attempt this build, be aware that it involves some delicate parts. The FPC is extremely fragile and can break if you force it to bend in a direction it doesn’t want to go (say, around the sharp angle of an L-shaped case).
Getting the cable to conform to the design was challenging; I tried using tweezers to coax the cable around the bend but got nowhere fast. Connecting and routing the ribbon cable extension was the most stressful part of the assembly. The case design just doesn’t accommodate the path the ribbon cable naturally wants to take. Following a helpful tip from a commenter on MakerWorld, I managed to snake the cable through the narrow passage by attaching a bit of paper tape to the end of the ribbon connector.
Don’t do what I did. Try the prism stand design. This was a pain. Credit: Nick Indge Don’t do what I did.
Try the prism stand design. This was a pain. Credit: Nick Indge After powering on the kit for the first time, you’ll see the TRMNL logo and a QR code on the e-paper display. Scanning the code redirects you to a “How to set up a new device” guide written by Kulp, the TRMNL creator.
The guide had been updated just 15 minutes before I clicked the link—a promising sign of a living document that is constantly evolving. OK, now what? OK, now what? TRMNL.com I wasn’t planning to use the trmnl.com service, but I wanted to get a sense










Leave a Reply